

You need a Drata plan with Third-Party Risk Management, and an Admin or Owner role in VendexLabs to set it up.
Connect Drata
1
Open Connected apps
Go to Settings → Connected apps. Under Send data to, choose Connect next to Drata.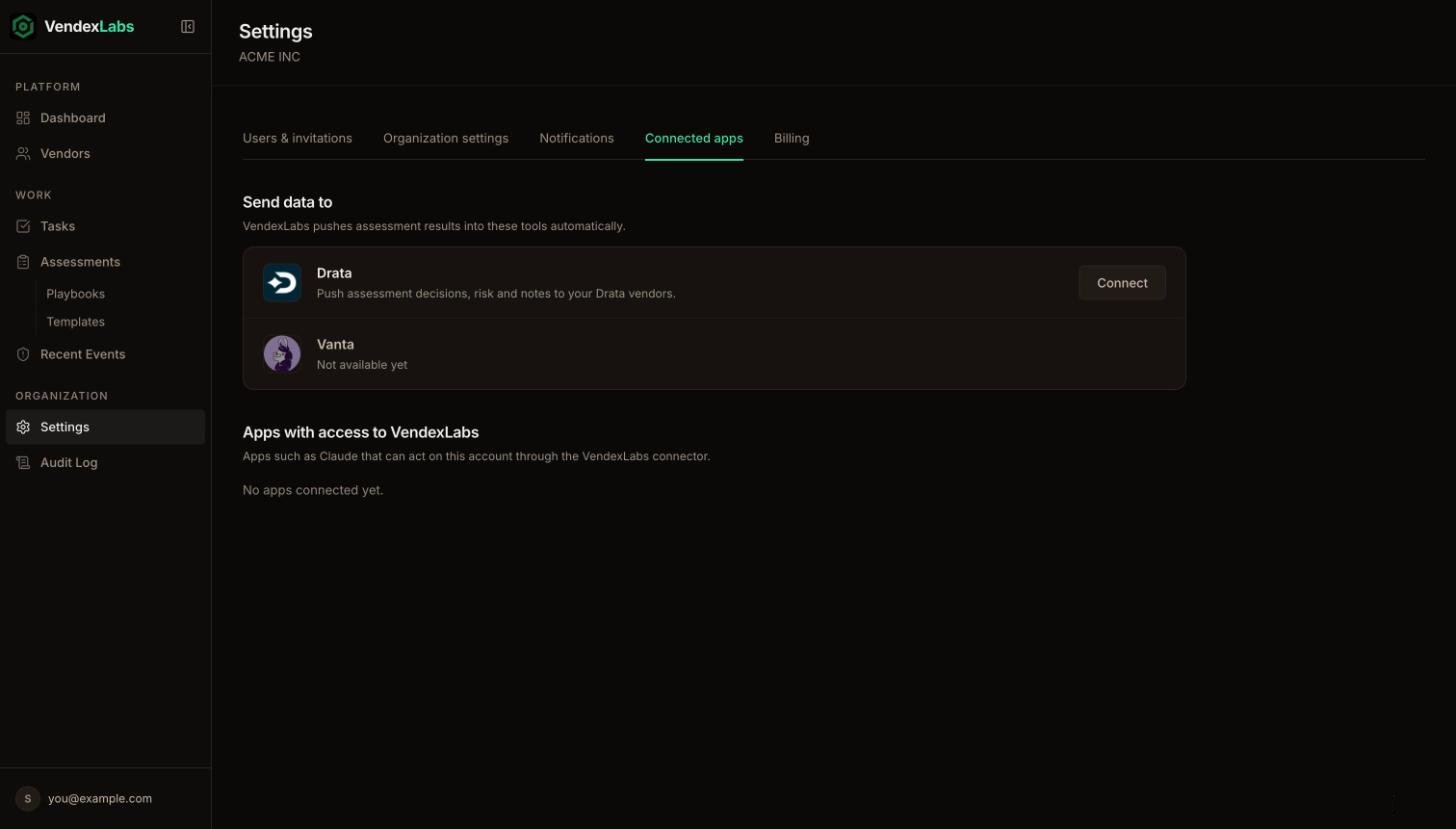
2
Create credentials in Drata
Pick how VendexLabs connects: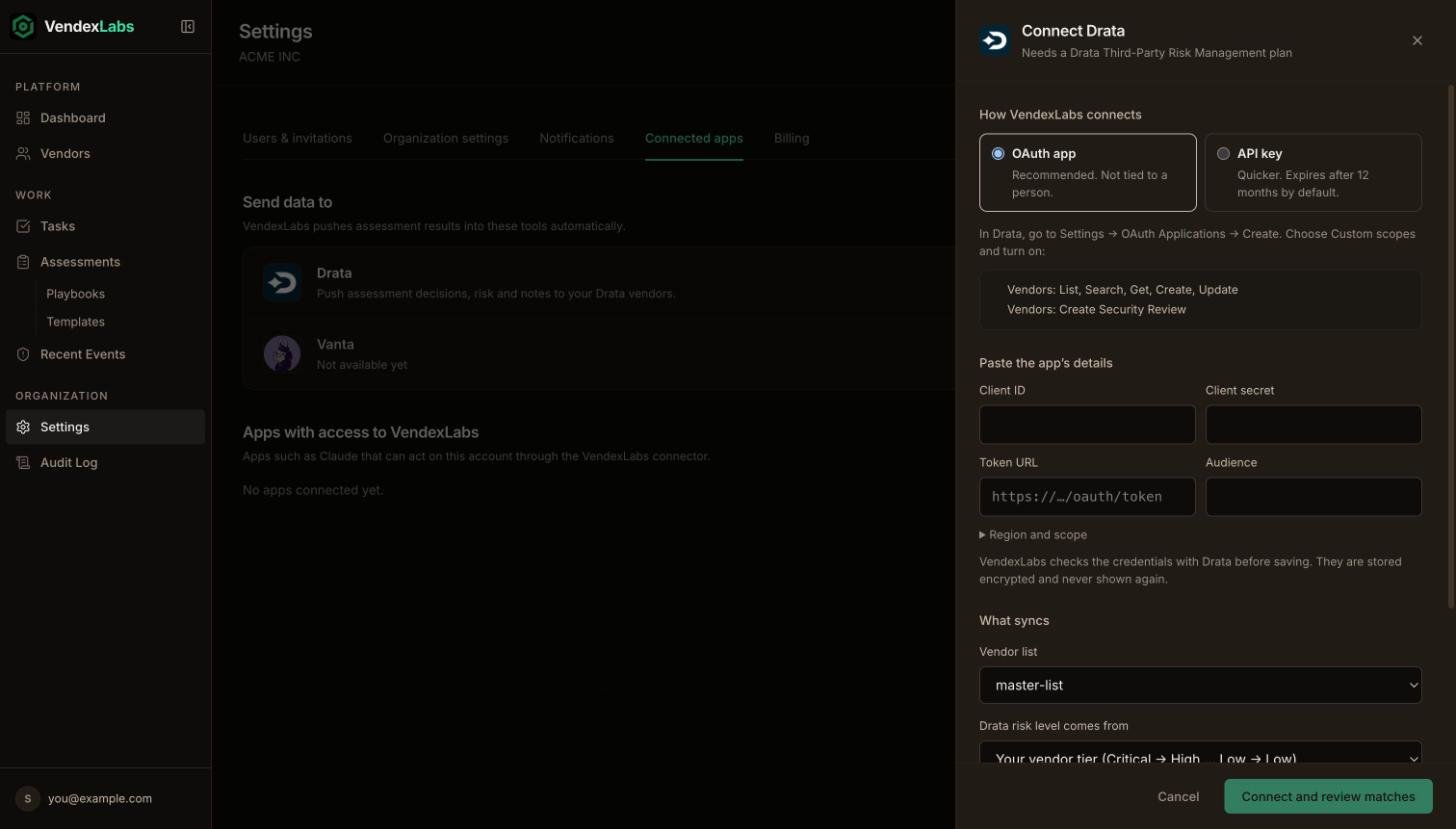
- OAuth application (recommended, not tied to a person). In Drata, go to Settings → OAuth Applications → Create, choose custom scopes, and turn on the scopes VendexLabs lists.
- API key (quicker, expires after 12 months by default). In Drata, go to Settings → API Keys → Create API Key, choose custom access, and turn on the same scopes.
3
Set region and options
Change the Drata API URL if your workspace is in the EU or APAC region. Choose which vendor list to sync and where the Drata risk level comes from: your vendor tier (Core → High, Standard → Moderate, Minimal → Low), the VendexLabs risk score, or don’t send risk.VendexLabs checks the credentials with Drata before saving. They’re stored encrypted and never shown again.
4
Review matches
Nothing is sent yet. VendexLabs looks through your Drata workspace and shows how each vendor matches:
Undecided vendors are skipped and wait in Needs attention. When the list looks right, approve it to start syncing.
What syncs
- The risk level and renewal date on the Drata vendor, while VendexLabs still owns them.
- A VendexLabs notes section on the vendor with the assessment summary.
- A completed security review in the vendor’s Drata history each time an assessment is approved, conditionally approved, or rejected.
Keep an eye on it
The Drata page in Connected apps shows:- Needs attention: vendors waiting for a match decision, or whose Drata vendor was deleted.
- Recent activity: each sync and what happened, for example Created vendor in Drata and linked it or Added a completed security review.