
Open the vendor's assessment
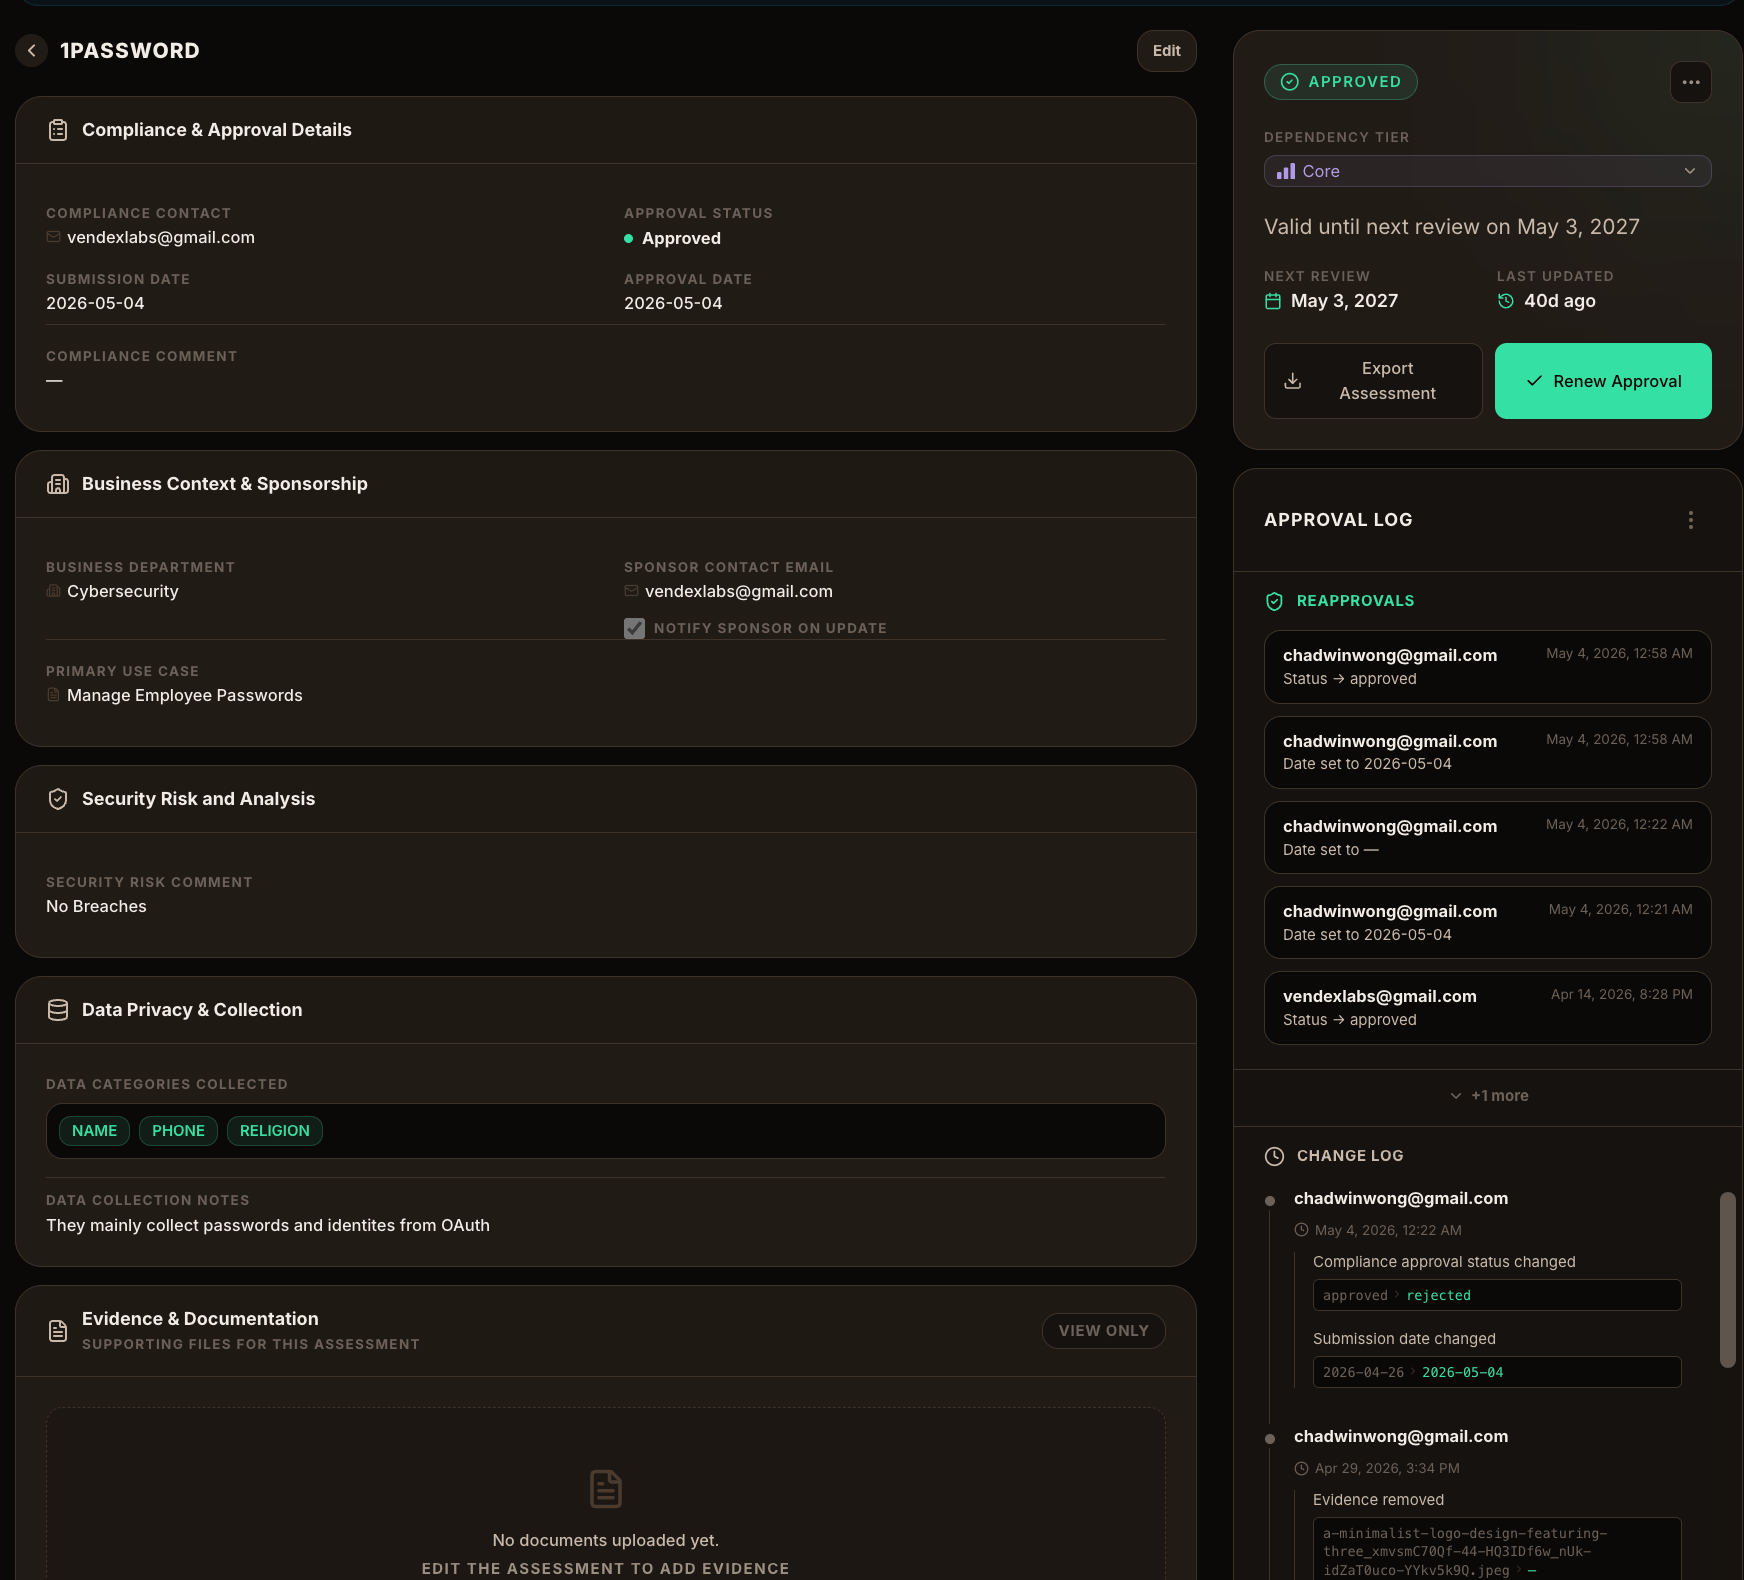
Go to Assessments and select the vendor. You’ll see its current status, tier, and department, plus a detail panel. Choose Edit (or Full page) to make changes.
Add business context
Record the sponsoring department, the internal sponsor contact, and the primary use case. Turn on sponsor notifications if you want the sponsor kept in the loop on updates.
Document data handling
List the data categories the vendor collects (for example, name, phone) and add notes on how that data is used. This is what makes the assessment useful for privacy reviews later.
Add compliance notes and contact
Capture your security risk and compliance comments and the compliance contact responsible for the decision.
Attach evidence
Upload supporting files — completed questionnaires, SOC 2 reports, certifications — under Evidence & Documentation. Evidence is stored with the assessment.
Set an approval status
Choose the outcome: Approved, Conditional Approval (with the condition stated), On Hold, Rejected, or leave it In Progress. Set the submission and approval dates as appropriate.