> ## Documentation Index
> Fetch the complete documentation index at: https://docs.vendexlabs.com/llms.txt
> Use this file to discover all available pages before exploring further.
# Add & import vendors
> Build your vendor inventory by adding vendors from the catalog or importing a CSV.
There are two ways to get vendors into VendexLabs: add them from the shared catalog one at a time, or import a whole list from a CSV. Both routes automatically enrich and score new vendors.
## Add vendors from the catalog
From the **Vendors** page, choose **Manage vendors** to open the vendor catalog.
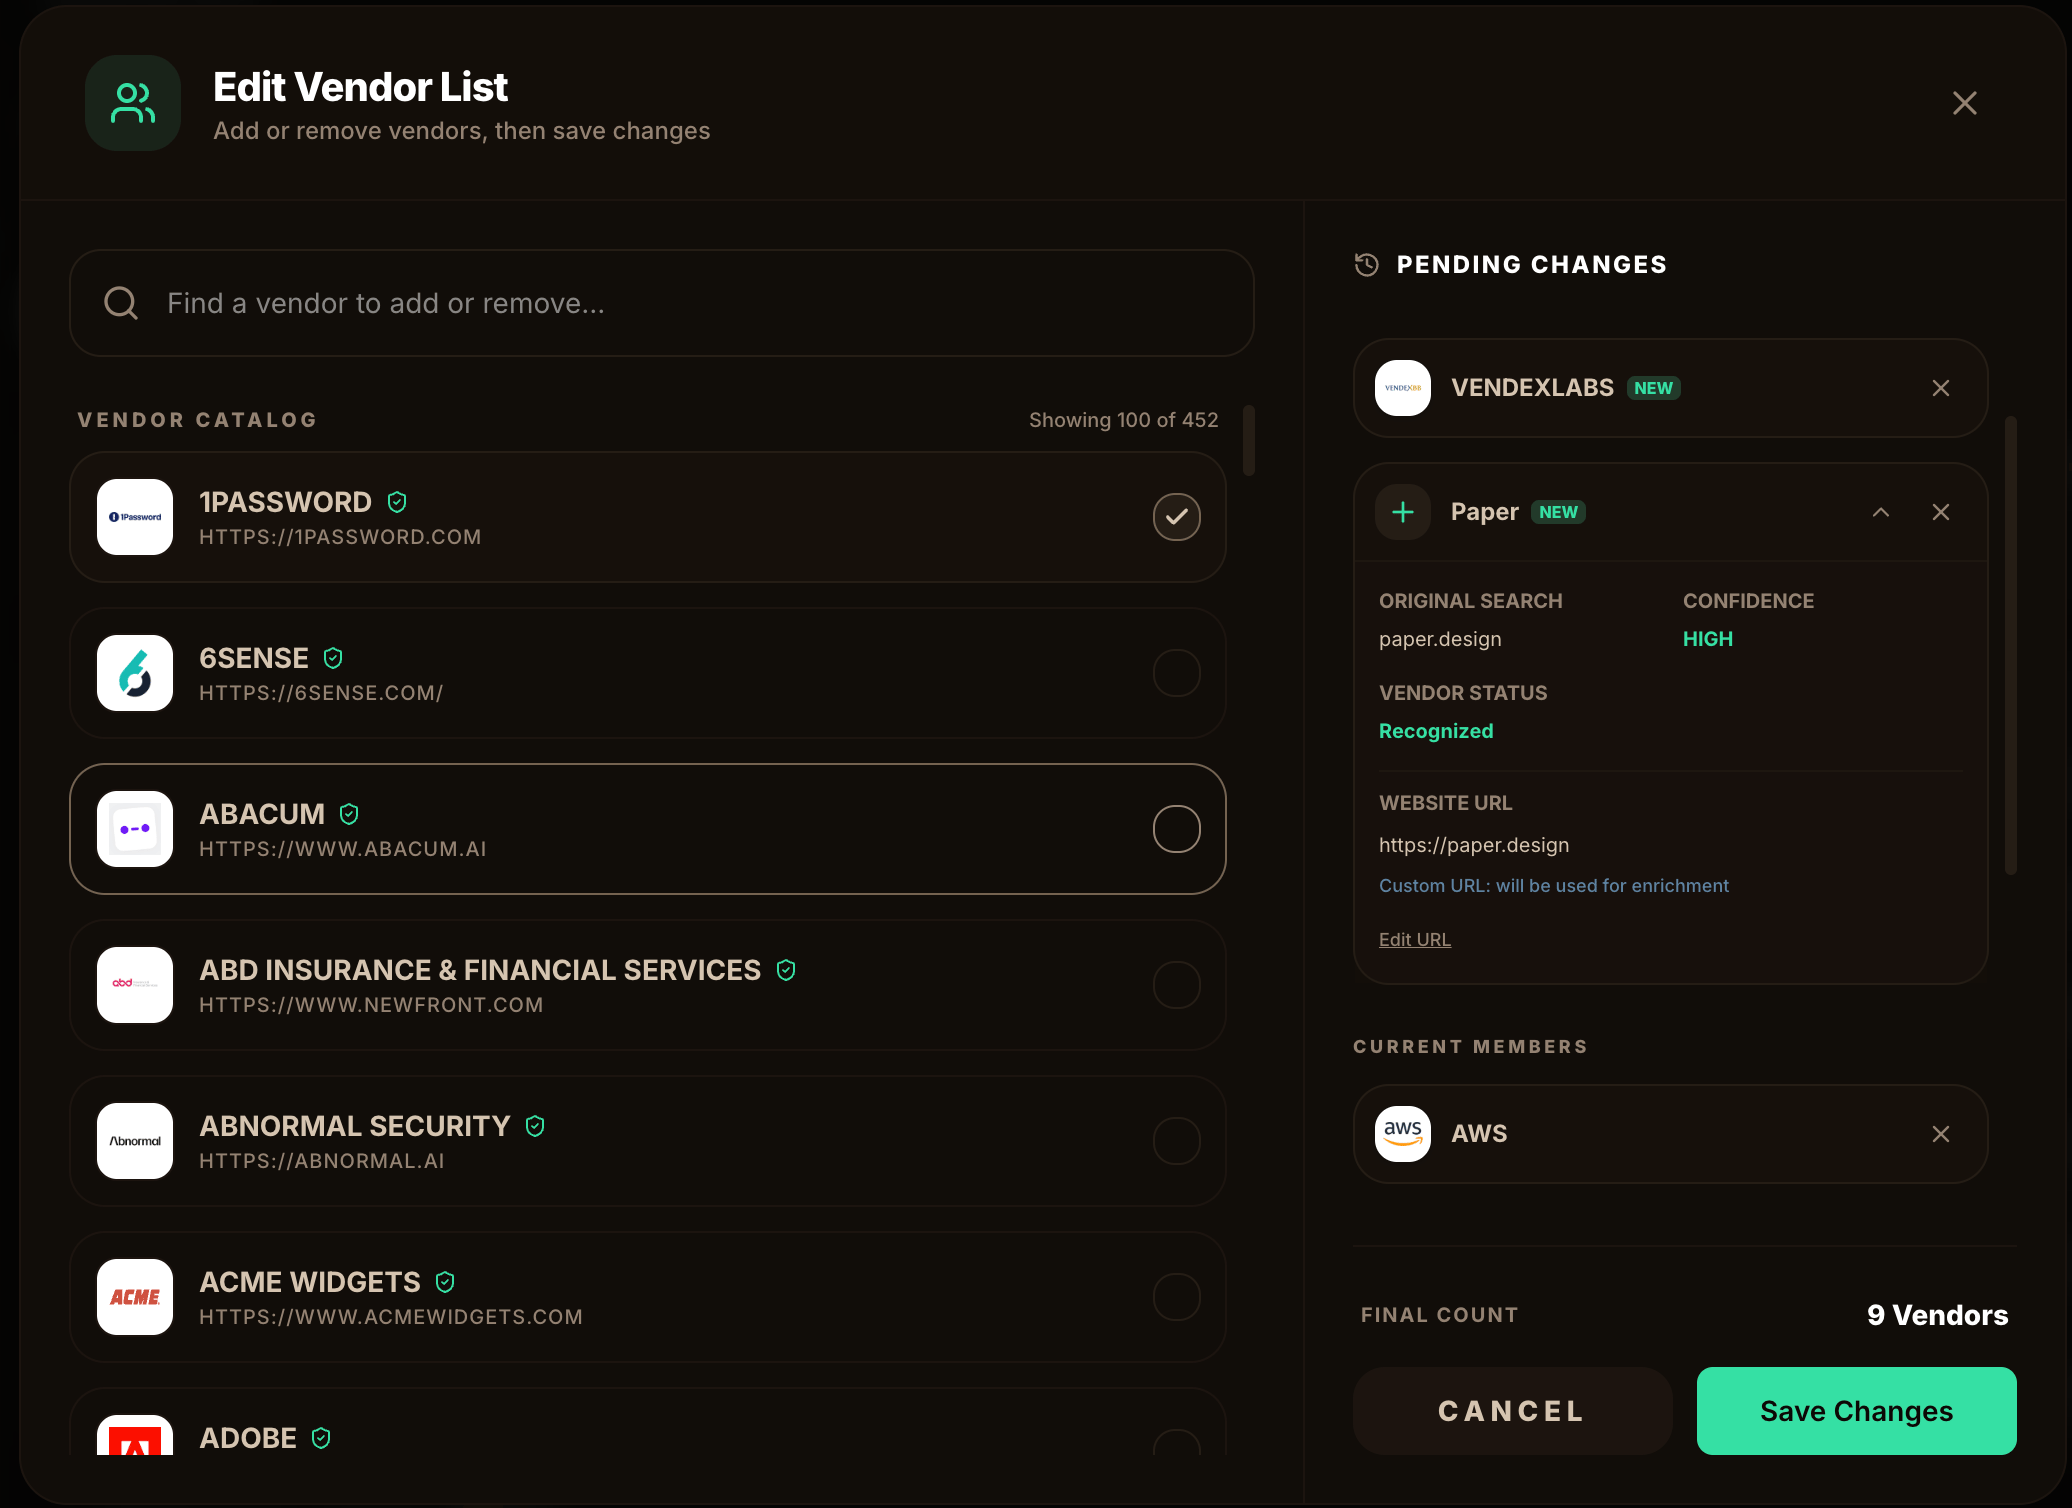 Search the catalog and select the vendors you work with. Recognized vendors are marked and added instantly.
If a vendor isn't in the catalog, add it by name and website. VendexLabs marks it as a new custom vendor and will enrich it from the website you provide.
The right panel shows what you're about to add or remove, along with the enrichment confidence and resolved website for each new vendor.
Choose **Save Changes**. New custom vendors are queued for [AI-powered enrichment](/concepts/enrichment) — agent-based research assembles company details, security and privacy posture, and a first cited score, usually within a few minutes.
Each organization can add up to **500** distinct custom vendors. Vendors already in the shared catalog don't count against that limit.
## Import vendors from a CSV
To bring in an existing list, choose **Import Vendors** on the Vendors page.
Use the in-app format guide. Each row is a vendor; the vendor name is required. Optional columns include the vendor **website** and a **product name** (repeat a vendor across rows to add multiple products). You can also include assessment fields such as tier and status.
VendexLabs validates your file first and shows a preview, including any **custom vendors** it doesn't yet recognize, before writing anything.
Confirm to merge the rows onto your list. New custom vendors are enriched automatically, and the vendor grid populates as scores come in.
Large imports are processed in batches so they stay responsive. Files are capped at **1 MB** and **500 rows** per import.
## Set the dependency tier
After adding vendors, set each vendor's [dependency tier](/concepts/dependency-tiers) — Core, Standard, or Minimal — from the vendor row, the detail page, or your CSV. Tier drives how much each vendor affects your portfolio posture.
With vendors in place, record your first approval decision.
Search the catalog and select the vendors you work with. Recognized vendors are marked and added instantly.
If a vendor isn't in the catalog, add it by name and website. VendexLabs marks it as a new custom vendor and will enrich it from the website you provide.
The right panel shows what you're about to add or remove, along with the enrichment confidence and resolved website for each new vendor.
Choose **Save Changes**. New custom vendors are queued for [AI-powered enrichment](/concepts/enrichment) — agent-based research assembles company details, security and privacy posture, and a first cited score, usually within a few minutes.
Each organization can add up to **500** distinct custom vendors. Vendors already in the shared catalog don't count against that limit.
## Import vendors from a CSV
To bring in an existing list, choose **Import Vendors** on the Vendors page.
Use the in-app format guide. Each row is a vendor; the vendor name is required. Optional columns include the vendor **website** and a **product name** (repeat a vendor across rows to add multiple products). You can also include assessment fields such as tier and status.
VendexLabs validates your file first and shows a preview, including any **custom vendors** it doesn't yet recognize, before writing anything.
Confirm to merge the rows onto your list. New custom vendors are enriched automatically, and the vendor grid populates as scores come in.
Large imports are processed in batches so they stay responsive. Files are capped at **1 MB** and **500 rows** per import.
## Set the dependency tier
After adding vendors, set each vendor's [dependency tier](/concepts/dependency-tiers) — Core, Standard, or Minimal — from the vendor row, the detail page, or your CSV. Tier drives how much each vendor affects your portfolio posture.
With vendors in place, record your first approval decision.